
Shooting 35mm film through a Pentax 67

Dune Cruising in the OBX ■ Pentax 6x7 ■ Kodak Ektachrome 100 (35mm)
THE WHY
Because it’s fun. The aspect ratio, the sprocket holes, the challenge. There’s always a reason for doing something, and all of these answers satisfy the question: “Why?” It’s gimmicky, so what? Purists may roll their eyes, but let ‘em. Have your fun. No one said 35mm film has to be shot only in a 35mm camera. If someone has come up with way, explore your creativity.
THE HOW
Now that you’ve justified your reason for wanting to run 35mm film through a Pentax 67, let’s get to making that possible. Here is what you’re going to need:
Pentax 67 panoramic adapter kit
Film changing bag
Roll of 120 to burn
Your favorite stock of 35mm film (36 exposure)
Straight edge
Scotch tape
Scissors

The Kit
The Pentax 67 panoramic kit is readily available on eBay. They’ll all come with adapters for both rolls, a mask for your viewfinder, and a guide/mask for your shutter. For this set up, you’ll end up using just one set of adapters and the mask for your viewfinder. The shutter guide/mask will be used make sure your set up is square, the other adapters keep in your desk drawer in case you lose one.
Film changing bag
I’m jumping to the end first so you know the importance of this part. After you take that last shot, there’s no way to either wind the roll back into the 35mm cannister, or advance it and have it protected from light onto the 120 spool. You’ll need to put the entire camera in the film changing bag with a pair of scissors so that you can pop open the back and unload it with the film exposed. Grab one at B&H Photo if you don’t have one, as this is a must. Once in the bag and opened, release both rolls and use the adapter to rewind the 35mm cassette. Once rewound, cut the backing paper and you’re done!

Sunrise at Raleigh-Durham International ■ Pentax 6x7 ■ Kodak Ektar 100 (35mm)
Prepping the film for loading
This is NOT as simple as pulling the 35mm leader across, threading it into the 120 spool, closing the back and advancing to frame 1. It could be, but you’ll waste a TON of film. I like to get the most out of a roll, and remember - once you finish a roll you can’t immediately unload it.
Also, you cannot use the Pentax 67 “trick” where you open the back door, advance the frame counter and hold it while you close the back door to immediately begin shooting the roll. Many have had this idea so you don’t have to bother with the 120 backing paper detailed below. The distance the Pentax 67 advances is NOT the same between every shot of the frame counter. This is because as you advance the film between shots 1-10 the film on your take up spool is getting fatter. So technically it has to reduce the distance it advances after each frame.
STEP 1: BURN A ROLL OF 120
This is the simplest way to get your backing paper and 120 spool. Load your roll of 120 like you are about to shoot it as usual. Thread the backing paper onto the uptake spool and advance to the 120 arrow. Close the rear door and advance to shot 1. NOW STOP. Pop open the rear door. Mark on the backing paper just to the right of the shutter. This is where you’ll be cutting the backing paper and attaching the 35mm leader. This should be 8” from the start arrow. Pull out both spools and cut roll. You can dispose of the left-hand side, and make sure to peel the film and masking tape on the backing paper from the right-hand side.


STEP 2: PREPPING THE 35MM ROLL
Now it’s time to prep that 35mm roll. Put your adapters into your 35mm cassette. The taller adapter goes on top, shorter on bottom. Carefully load the 35mm cassette w/ adapters and drop the shutter window mask/guide into place. Verify that your 35mm film runs perfectly into the mask/guide. Here is a decisive moment for you: If you want the sprocket holes to be exposed around, REMOVE the shutter window guide/mask. As you can see in the picture below, the shutter window guide/mask will cover the sprocket holes, preventing them from being exposed.
Pull the 120 backing paper back across (you will need to pop out the spool to unwind it) and tuck it under the 35mm leader. With some masking tape, tape the leader to the backing paper. Make sure it is nice and secure.


STEP 3: SECURE 35MM FILM TO BACKING PAPER
Remove the 35mm cassette and 120 spool from the Pentax 67. On the front side of the backing paper, completely tape the leader to the backing paper.
Now unroll the backing paper and lay it flat on a table. Using some kind of straight edge (I used a paint stir stick) draw lines from the top and bottom of the 35mm film to the start arrow on the 120 backing paper. Now cut out the backing paper above and below the 35mm film to the arrow.
Once the 120 backing paper is cut, make sure to flip it over and tape the backing paper to the 35mm film. Curl around the edges so that it is very secure. Now, rewind the 35mm cassette so the backing paper is pulled into the cassette all the way to the 120 loading arrow. Your assembly is complete!


STEP 4: LOAD THE FILM
Using the 35mm adapters again (tall on top, short on bottom), load your 35mm cassette and your 120 spool. Advance the arrows to the 120 start line again.
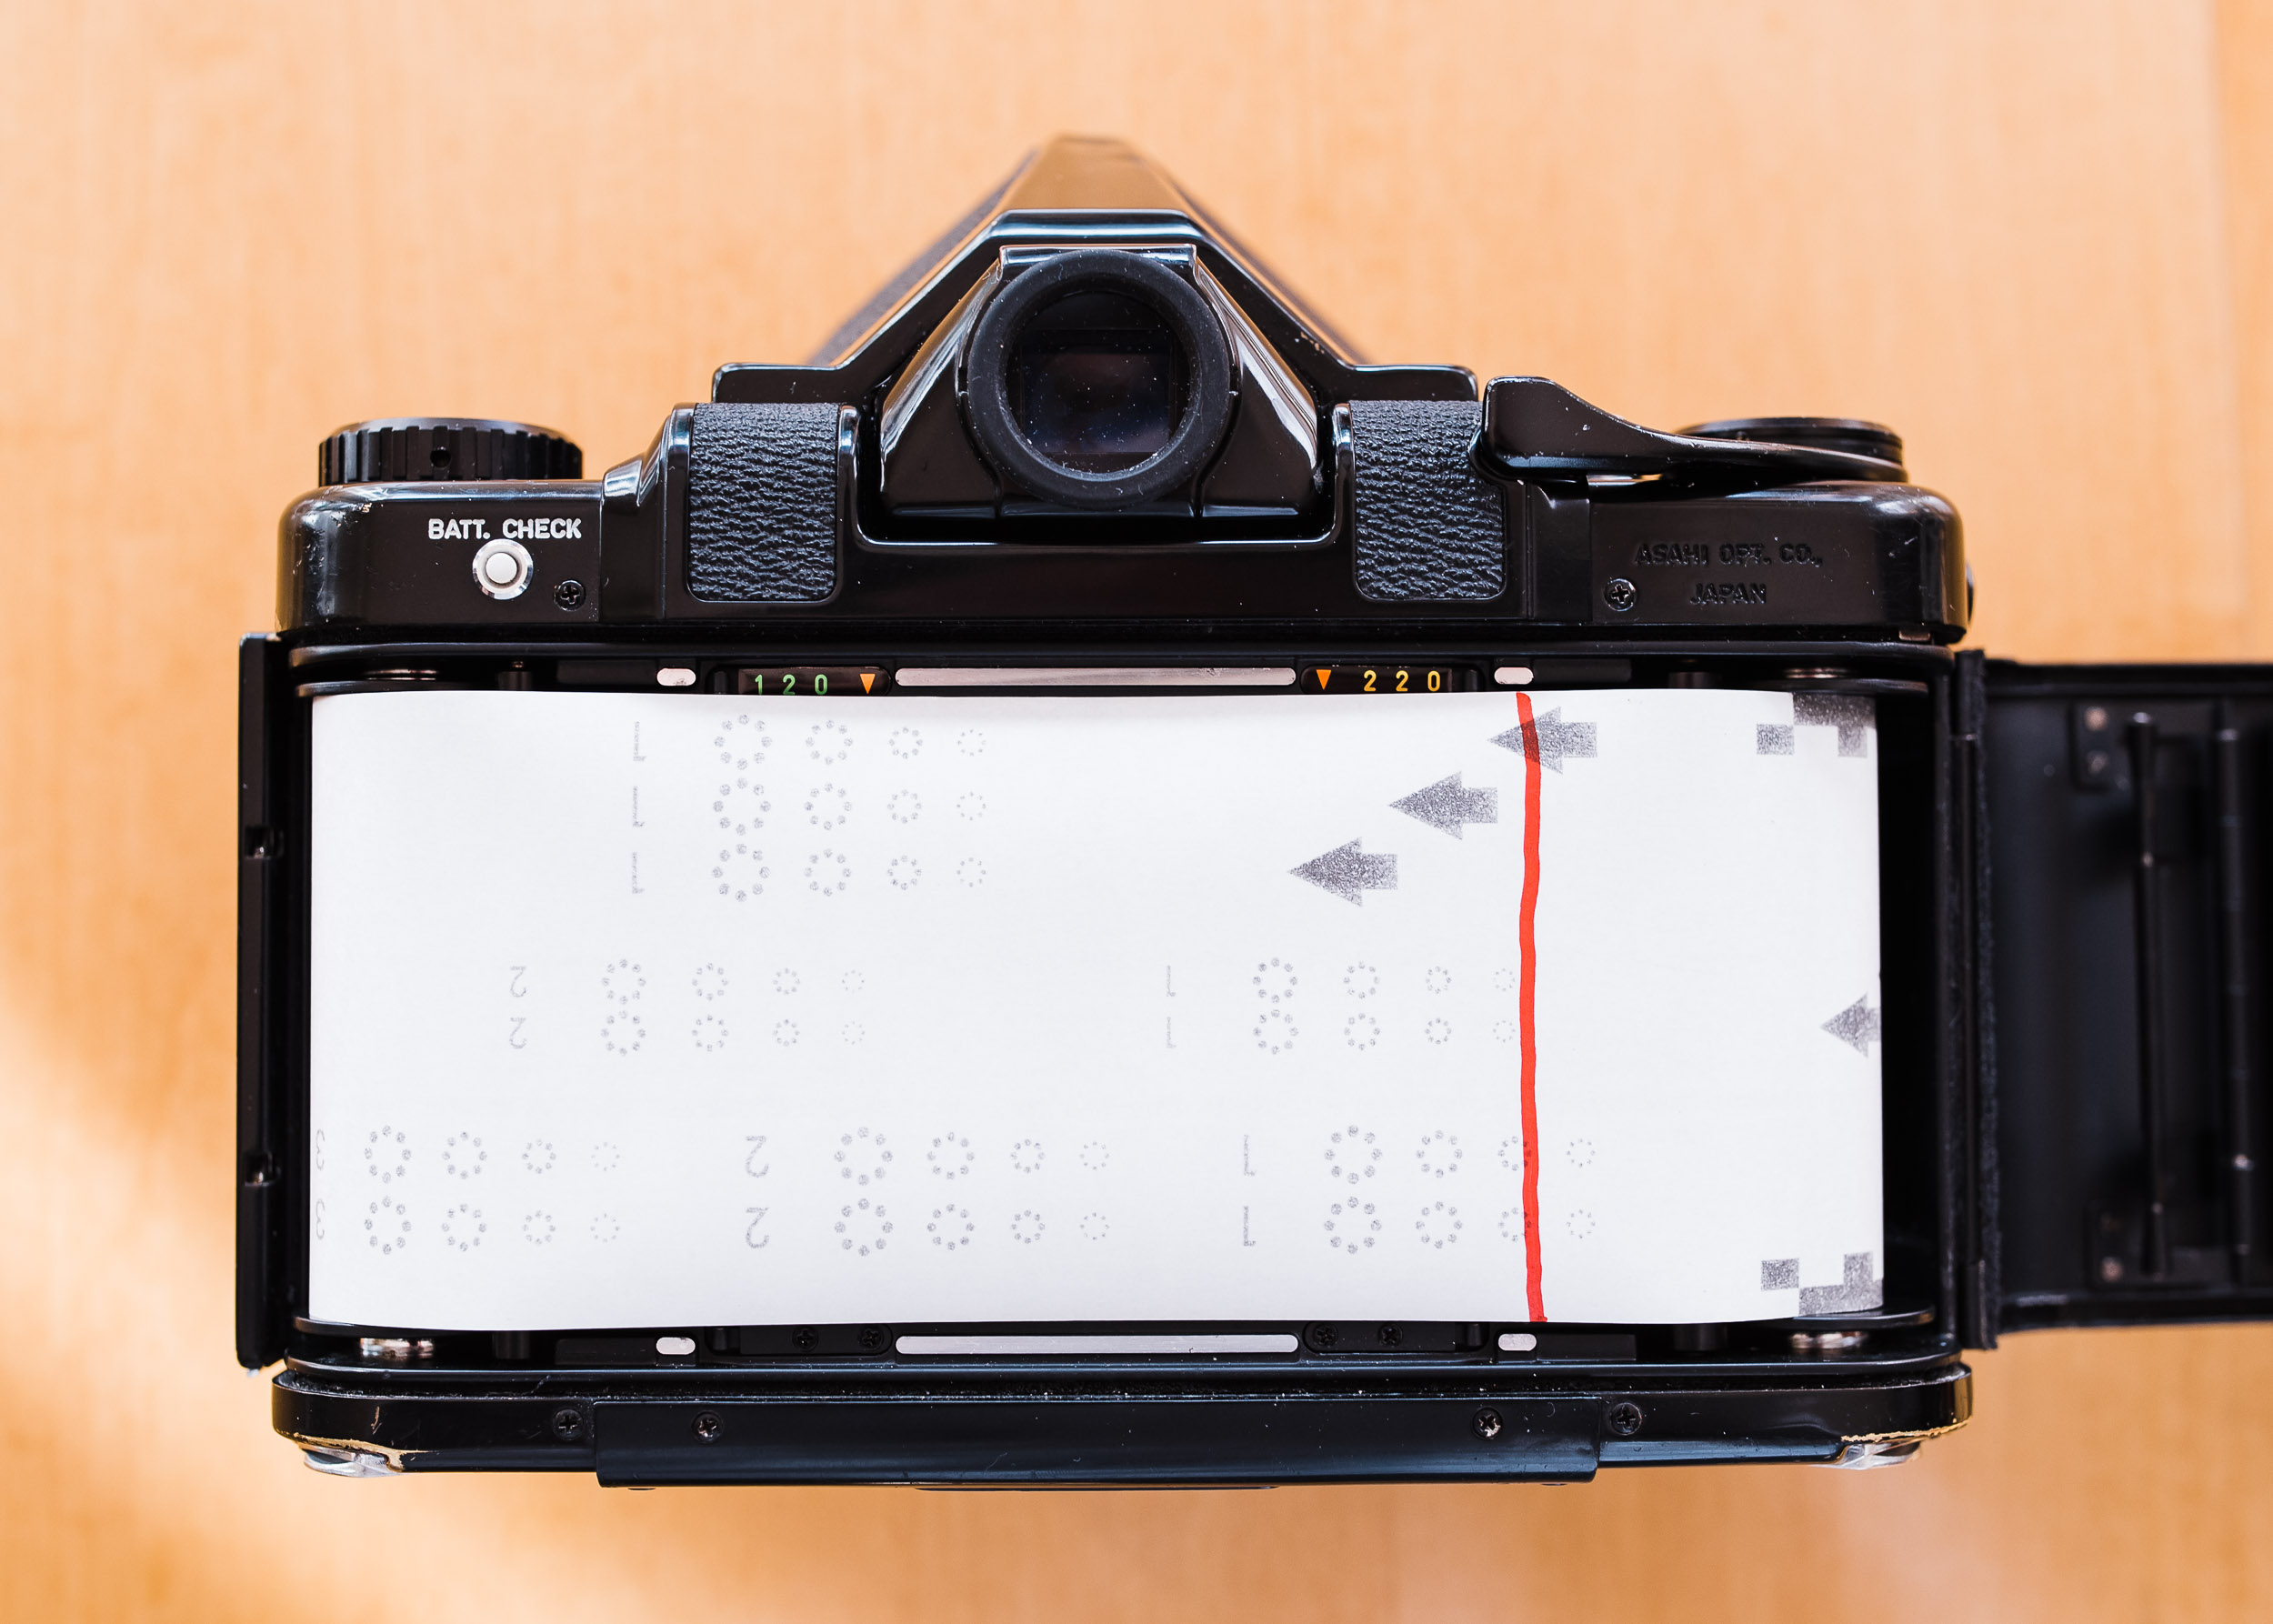
Before you close your back, you need to change the pressure plate on the back door to 220. This is because 220 film does not have backing paper the entire roll, exactly how your 35mm film will be run through. You also need to change the 120/220 selector on the side of the camera to 220 so that you can shoot past 10 frames.


STEP 5: VIEWFINDER MASK
Lastly, you need to drop in your 35mm mask into your viewfinder. Without it, you will not know exactly how to frame your shot. Does not matter how it is oriented as it is the same either way. Just drop it in.

Pentax 67 focus screen with 35mm mask
And that’s it! Now get out and shoot! With this set up, you should be able to get exactly 19 exposures. After you fire that last exposure, make sure to be careful if advancing the film, as you’ll reach the end of the 35mm film. Proceed to the film changing bag for unloading.
For a wider view, the 45mm and 55mm work very well. Of course, the 105 can work very well for environmental portraits.


Thanks for stopping by! Any comments or questions? Please leave them! You can also find me on Instagram.


